Showing posts with label p2. Show all posts

Tuesday, 7 June 2011

digital Manipulation - a before and after image - the dreamy

 Using the dreamy image again I experimented with colours, curves, blend modes and filters:-

                                     1.                             original image

                                  2.     I adjusted the colour balance again by adding a new layer.


3.          Here I added a brightness layer


4.

 I added a photo filter 'hard yellow' layer with a pin light blend. I was also taking the 'eye' off different levels to check their effects.

5.

I could see my original image held more forefront green grass (but this was abit drab looking) and that once I added the hard yellow filter there was too much yellow, so I decided to combine the original image with the amended version, also placing my original in photoshop and experimenting with  the opacity and fill levels to see what happened.


6.

This put more green of the grass in with the yellow and looks very bright, but the opacity would need to be turned down because the yellows were now competing with the reds in boldness.

7.

This was better as it showed the yellow pattern that I wanted to highlight in the stem of the full main flower (left of the image) which remind me of a glass stem.  It also shows a mix of yellows in with the green grass to bring the picture alive.

                                                      the history box shows my actions

                                                        
Other setting that I tried from a fresh original:

                                     8.   Here I used the curves to adjust the contrasts and colours.


                                            9.   I was experimenting with overall colour changes.  I  quite like this unusual effect because  the glass stem has a nice highlight contrast. I would like to make the stem stand out more next time.

10.

                                                             11.

                                                          12.

These images show more contrast inside the flower cups than image 7 above.

                                                   13.

Still experimenting I was looking at the channels and how a 'RGB' image is made up of red, green and blue.  It looked like an eerie face formed here. I saved my images in file formats psd and jpgs. The psd ones I will be able to return to for further amendments if required. The jpgs are ready if I chose to use them for presentation.

Wednesday, 6 April 2011

Sally Apfelbaum (for theme 1)

The colours in the above images are bold and stand out more than the details.
I like these prairie scenes that look slightly impressionistic.
  
The above images show more work by Sally Apfelbaum and I  wonder at this stage whether she and Linda Hackett were influenced in part by impressionist art, because some of their work can have a look of a painting.... they use colours more than focussing on the details. 

Wednesday, 30 March 2011

Research - Linda Hackett for theme 1


taken by Linda Hackett

                                                            Taken by Linda Hackett

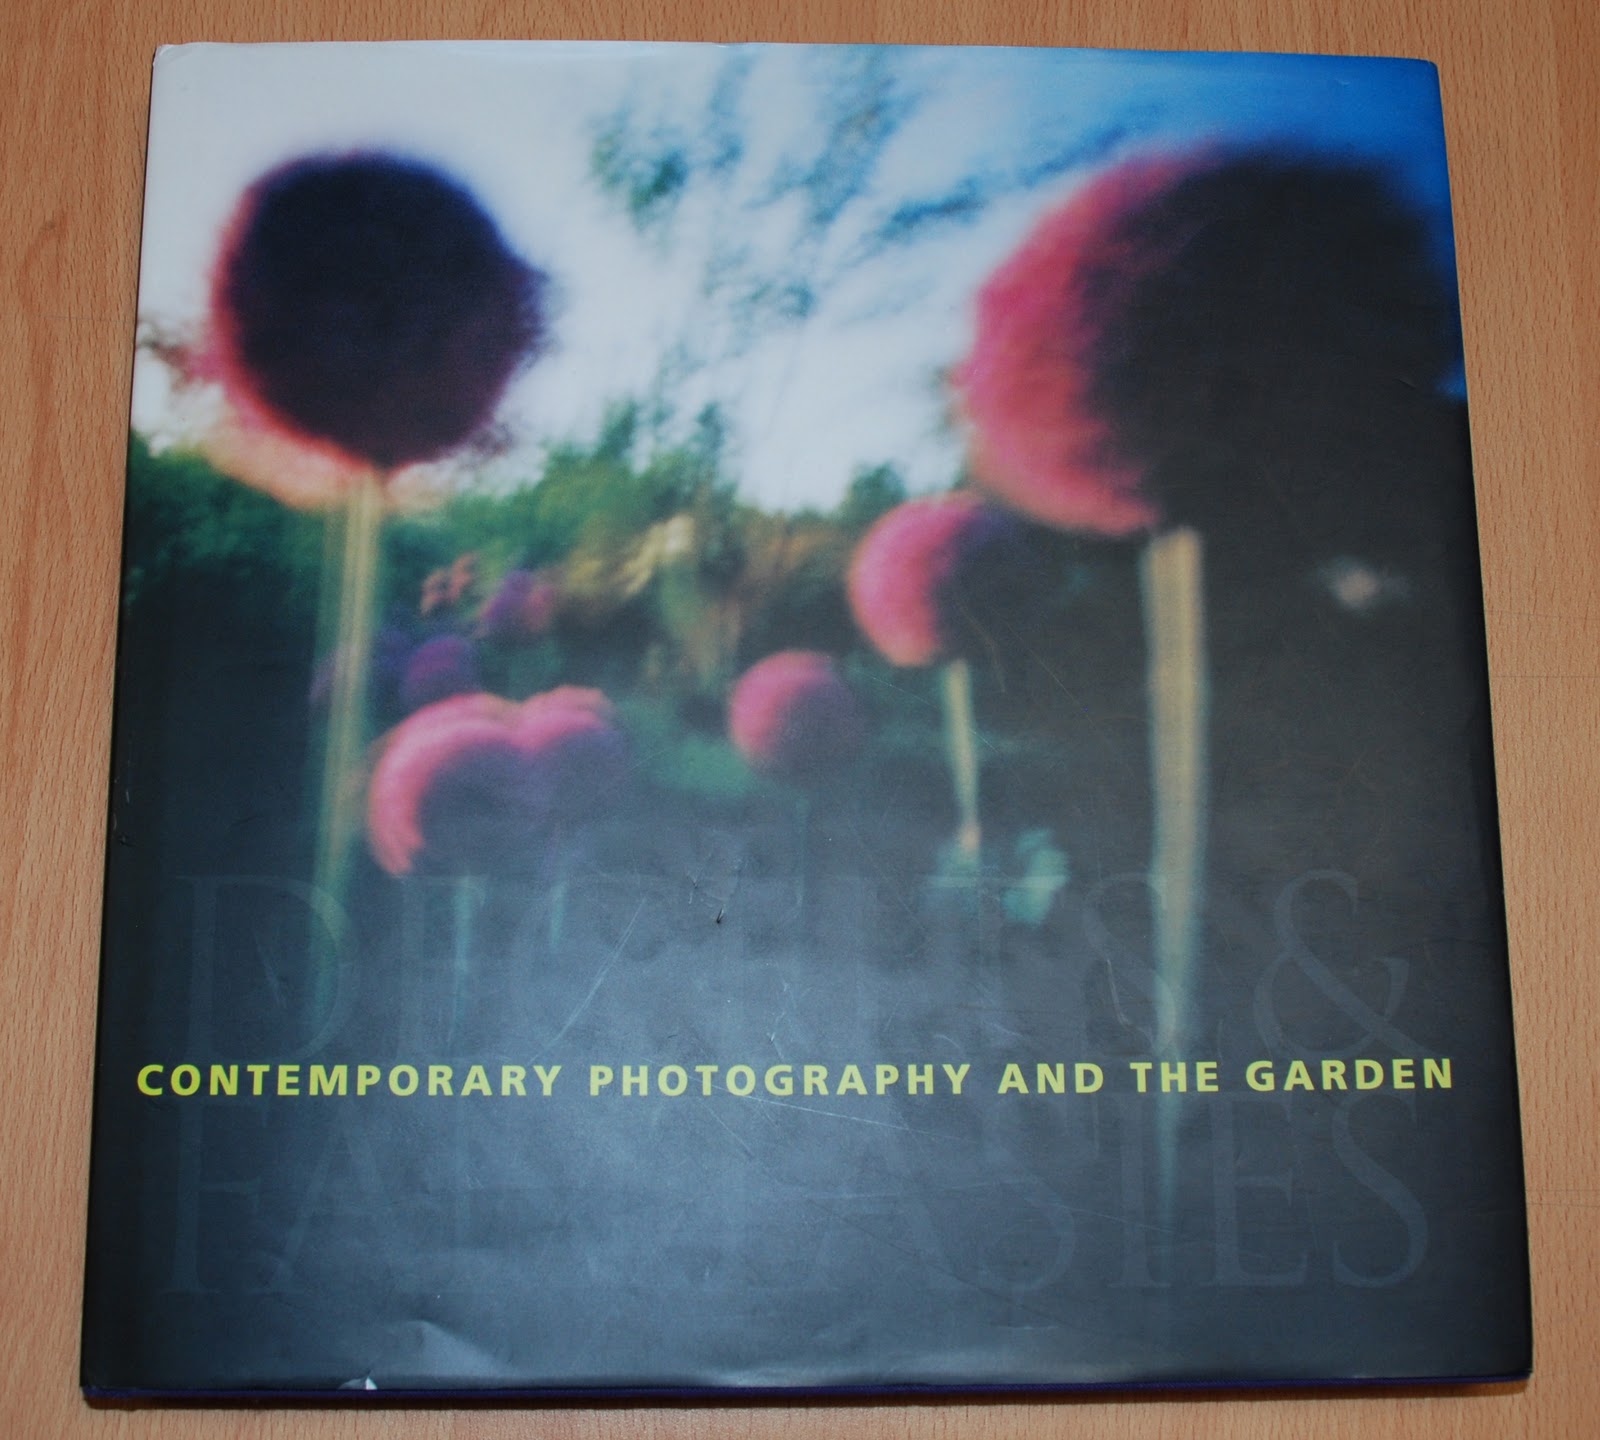
I was looking at a book in college class ( Contemporary Photography And The Garden) and noticed some images by Linda Hackett.  They were blurry which gave a soft look with a dreamy sort of mood. There is a sense of  happy spring time in the above and its very colourful. The blur makes your eye search out things in the scene.  I decided to experiment with some blur and some focus in search of the dreamy look....

Linda Hackett is an American who started photographing an abandoned estate garden near her home in Southampton, New York in the mid 1980's.  She exaggerates colour and plant forms in her hallucinatory type imagery where elements of light and air take on an almost phisical presence.
She uses a pin hole camera which encompases extended exposure times to record the effects of wind movement through the garden.  She often places the camera so close to the subject that it would be unrecognisable without the written descriptive.  Hackett works exclusively at dawn and dusk when longer exposure times are required and adopts a "plants eye" perspective of the garden.  Her pin hole camera distorts light to give a metamorphosis mix of the light and intense colours resulting in the production of a surrealist atmosphere.

I have taken the following shots  in the garden at dusk in the shade.  I don't think the above was taken in any direct sunlight.  Here I am experimenting  firstly on smaller objects, to try to achieve a dream like effect, before I go out and try the full scene shots.  However I do not have a pin hole camera so will try to achieve the best I can with what I have.

shutter 1/6  aperture f4.0  iso 200  focal L 99mm

These 2 images contain some sky as in Linda Hackett's but not the same lovely blue.  I have included them because I like the curves of the twigs, but they don't have the appeal overall of Linda Hacketts, they don't really work the same.  Also these are where I have focussed in  a lot closer to the subject whereas Linda's  shot more of a full scene.

                                                shutter 1/25 aperture f4.0  focal L 105mm

I used a slow shutter speed and wide aperture which helped with the blur effect to the background and zoomed in to capture some detail.

shutter 0.4  f4.0  iso 200  focal L 105mm

The above image is better where sky is not included, I think it makes for a better composition and is more colourful because of the contrasts of the flowers to the dark green background.  Whilst the flowers are bright, they do look abit over exposed in parts, and  this loses detail, which could be ok here as I did not want all the details to be apparent anyway.

None of these images are completely blurred like that of Linda Hackett's which I think is not so easy to pull off successfully.  The sun was fading when I took this shot,  and no light was on the scene at all but because it had been a bright day and was now dusk, light still caught the flowers (above image) making them look bright. The dark shadows of the conifers gave the dark background.

                                                  shutter 1/25 f4.0  iso 200  focal L 75mm

The image above is more of a scene where I zoomed out abit.  I like it in part because it is unusual.  I think it captures dreamy slightly but it has hardness with the softness, given by the form of the tree trunks. In Linda Hackett's image the darkness on the left gives some drama and I wonder if the darkness here on the right achieves that.  What I do like is the triangle view of the sprigs, and it does make me think about the image more than my close shots above, which is what Linda Hackett's did.

                                              shutter 1/6  aperture f4.0 iso 200 focal L 105mm

The above is my completely out of focus image but it is only slightly so it still does not achieve the right effect.  I gained this all over out of slight focus by moving slightly as I took the shot hand held.  It has no dreamy quality and it left me wishing it was actually in full focus because I liked the colours and composition. 
 Again it is using hard and soft materials together and I had seen images that did this by another photographer in that same book, which I will look at again during class. 

 I took all these shots hand held thinking that any slight normal blur, by movement, may help what I trying to achieve.  If I was to attempt such shots again I could use a tripod and try tapping it as I released the shutter, but overall I think I need to use a slower shutter speed and move the camera around more.  I had had my camera set on a single centre focus point thinking this would also help make less of the scene in focus, but then I did focus with this centre point, in all but the last image, so this would not be the answer to achieve an overall blurry image either.


Other images I took:-
These images show some blur and some clarity in each just as my above ones do, hence still not achieving that overall blur look that looks correct.  However I do hope to capture the effect I am effect with digital manipulation later on:

                                                 shutter 4.0 aperture f4.0 iso 200 Focal L 105mm


shutter 1/8 aperture f4.0 iso 200 Focal L 75mm


                                             shutter 1/12 aperture f4.0 iso 200 Focal L 75mm


This is the cover of the book I have taken inspiration from in college class, Contemporary Photography And The Garden, Deceipts & Fantasies... where a group of artists in the mid 1980's turned to gardens as a subject for their photography.  It holds a wide range of artistic images whereby gardens are reflected upon as  sites of lyrical beauty and luxurient atmosphere to show them in a dark visual metaphor for the manipulation of nature.

Sunday, 13 March 2011

Labels and reading material

In last weeks class I learned how to label my work and collected books from the library to help my research.  I have read the Practical Photography magazine (September 2008 issue).  I am also currently reading a Photoshop CS5 in easy steps book by Robert Shufflebotham which I am finding very informative.

Wednesday, 2 March 2011

Theme 1 (developing ideas) Mertle

I have started practising at home, as Steve suggested, with Mertle my cat outside in the garden:

                                    shutter 1/50 aperture f4.0 iso 400 focal length 105.0mm

I was cleaning the house when I opened the back door to shake the duster outside and as I did so saw Mertle posing by the tree on the fence.  I was saying to her 'please stay there' as I rushed back in to grab the camera and quickly tried to focus using the above settings.  I only managed about 3 shots before she moved and this was one of them.  I loved the fact that she is in a nature type scene.  It's like she had popped herself there for me within a nice frame of bordering greenery. Im not so keen on the wire fence. Unusually she looks like she is standing in thin air as the dark area does not show the continuence of the wooden fence.  This coupled with the way the fence looks disjointed adds interest I think but I was unsure if the disjointed fence was distracting from her? so I cropped in a little:


Mertle
This shows more of her details and the way her green eyes match some of the greens in the photo.  I also like the details on the tree.  I wondered if I should have cropped in further, but sadly on closer inspection, Mertle was not as clear, due to the camera being hand held and me probably rushing to set controls and had some camera shake.   I do quite like the scene as a whole though.

Saturday, 26 February 2011

The Kit

I will be using the following Kit:

Canon EOS 5D Mark II EF 24-105L IS USM Kit.
SanDisk Extreme CompactFlash Card 8GB 60 MB/s
SanDisk Extreme CompactFlash Card 8GB 30 MB/s


I have read the Canon camera website for details of my kit which includes the following descriptions:


"This full frame EOS 5D Mark II combines outstanding resolution with 3.9 fps shooting and superlative high ISO performance.  The addition of full HD movie recording expands the boundaries of photography." It looks like the camera won a TIPA award in 2009. I am pleased with it and want to learn how to do it justice.


The site describes the 24-105mm L series Lens for photographers who target the face of nature in the course of their explorations.  So that fits in with my 'nature' theme.  It goes on to say its the perfect companion for shooting on the move and achieves crisp, undistorted L-series image quality throughout the entire zoom range.  It features high dust-moisture resistant qualities for reliable performance, even in the most severe conditions and meets the rigorous demands of professional photographers.  The lens boasts a super UD element, a GMo Aspherical lens and a Replica Aspherical lens and while I don't know what all this means, it sounds a good one, and hopefully I will get what I want from my pictures.


A Hoya Pro1 digital filter UV filter, 77mm,  fitted to the end of the lens serves as a permanent lens protector to guard against  dust/damage/weather.  It also absorbs the ultraviolet rays which often makes outdoor photographs hazy and indistinct.  This is a multi-purpose, fine-weather filter for colour and black and white photos.

I have not yet used the EW-83H Lens hood that came with the lens, but I intend to during this course.


The tripod is a CamLink TPPRE-27 that extends from 68cm-165cm high.  It is suitable for camera and video use, hence the large handle (for video use) which often gets in my way I have found with camera use.  I bought this tripod without much research, from a local store to where I work (in my lunch break) when I decided I needed one urgently during level 1 work.  I liked the fact that the guy in the store showed me how to use it and it seemed the easiest, lightest, whilst stockiest build like one they had in stock that day.  It also came with its own carry case with shoulder strap.   At the time I had thought I may not use it that often anyway.

                                                              Features:

                                                              *  sand bag hook on centre column
                                                              *  braced rhombic legs with quick locks
                                                              *  carrying handle
                                                              *  self levelling rubber feet

Thursday, 24 February 2011

Digital Manipulation - Minky

I took this shot of Minky my cat outside in the garden during October last year.  Though I liked the image, I thought the background was a bit distracting and so used the image as an overlay of 2 images as part of a task in my Level 1 work.  Now I have come back to the original image for  Level 2, I have deleted the distracting background and tweaked the brightness/contrast controls in photoshop:-

                                                                       Wild Minky
                                   aperture f5.6 shutter 1/3200 iso 800 focal length 90mm

I used the clone tool to make the background completely black,  by using quite a large heavy brush, because I was covering a large black area. I clicked on the top right of the image, to pick up the black colour on the brush, then proceeded to  brush over the coloured background, top left. As I worked I switched to a smaller brush when getting lower and near to the cats outline, so that I did not mix, or catch the cats colours on the brush.

I have given the image a full black background to make Minky look more dramatic. I had prepared by going into the garden with my camera and watched and waited until Minky was doing his own thing. He laid down and was reaching over to groom his fur.  He has a  trait of stopping mid way and just  gazing, so here I seized the moment.  With his fixed look and colours he emulates a wild cat to me, though in reality he is very soft and loveable.  I got in as close as was comfortable, on his level, without making him turn to look at me and with the camera set to aperture priority because I had to be quick, and I only wanted him in focus,  I ran off this image, among others.  The daylight was good I thought, coming from the left behind me, it seemed to be shining on and highlighting his facial features well.
I consider the manipulated image to be big improvement on the original.

I had taken the original image in file format 'jpeg' and presented it on my blog.

Researching animals

I thought it might help to read about pet photography, as I want to experiment/practise with pet portraits,  which may lead to the inclusion of animals on location within my nature scapes.
 I have looked at tips online at the website: photo.tutsplus.com/articles/shooting-articles/quick-tip-top-tips-for-pet-photography. (with thanks to Graham)
Here I learned the following:

Pet photography is similar to photographing children as in it can be difficult to get them to strike the pose you are after to make a good composition.  However if you get it right, it will be worth it.  It is easier to work with animals if you know the animal personally, so if I photograph my own pets, I stand a better chance of it working.

Follow these 5 steps:-

1)  FOCUS ON THE FEATURES
 I will need to focus on their features, like their facial features; eyes, fur, teeth.  They may have habits that I can highlight or particular traits.  I should  decide how I want to portray them.  A good rule is focus on the eyes.

                                                                   Photo by Jeff Balke

This is a great animal face expression of the cat being verbal or yawning.  I took a similar shot (entitled Moaning Mertle) when experimenting with my cat in Level 1, and was pleased to get her eyes clear:-

                                            shutter 1/2000 aperture f.4.00 focal length 70mm

I used aperture priority then for the above image and now I am trying to take the cats on the manual setting (see below)

2)  DIRECTION
It will not be easy to make the picture look natural because animals will not follow directions very often.
I could try to evoke a reaction from them with sounds or gestures, objects, toys  or an offering of food, to  try to get them to focus on me.   If they are not my pets it would be best to have the owner present and let them try to coax them , as the animal is more likely to follow their instructions, if any.  I could put more than one pet together and get them to react with each other.  They may prove unpredictable but also could produce some wonderful moments, providing the other animals are not too distracting.


                                                                 Photo by Trey Ratcliff

I have a family of 3 happy cats and these images show their closeness:


                                        shutter 1/40 aperture f4.0 iso 200 focal length 84mm

                                                                     Billy and Mertle

Billy and Mertle are brother and sister and while they do have a bean bag each, often choose to share one. This week I took these images at home.  On this image I liked the way they were both looking out the window at a similar angle.  I was on their level and zoomed in hand held before they moved.  The top image is the original shot and the bottom image is what I have cropped and try to omit distractions in Photoshop.  However I do not know how to omit and change all that I wanted to:  and would like the right hand window pane also filled with greenery... so I need to learn how to do this in class.  Digital manipulation is part of my work and I would rather learn some techniques as I go along, rather than leaving till later when I look more at that section.   When taking shots of animals it is difficult to capture  them in a background you would choose, so post operation becomes more necessary to achieve desired results.
I think next time I would try a higher iso because taking from the inside of the room, there is only light coming from the window side, resulting in some dark shadows.

                                
3)  BE ON THEIR LEVEL
With a quick lens ready for them moving about alot. I should try to take the shot from their eye level.  It would be best to carry light equipment to be mobile and not burdened down with too much equipment, so as to be quick to respond to their movements.  I should aim to fill the frame with my subject, take portrait shots and try to get in close, where possible to enable me to capture their facial expressions and posture.

                                                                  Photo by jcoterhals


                                         shutter 1/32 aperture f4.0 iso 200 focal length 105mm


                                                                        Close Cats

This is a better composition.  I have cropped further in from the image above where I had zoomed in further than with the 'Billy and Mertle' image.  This resulted in a slower shutter.   The new composition follows the rule of thirds, like Art Wolfe's animal images (see Research 2 for Theme 1) The colours are better and I like the different textures. I focussed on the intersection of the heads.  I have tweaked the light controls in Photoshop, but I do like the way the light caught tips of their ears and even shines through Billy Bears right lobe.   I like the way Bear (on the right) has is left eye open and I can just about make that out, but would prefer to see more of eyes or eye next time.  The scene has a calm feel to it I think with the animals snuggling up together. They feel safe here, in contrast to the animals in the wild who always have to be on their guard.

4)  ENVIRONMENT
I should look for a decent amount of light to light up my subjects.  If inside I could look at a strong light source like artificial lights, or be near a window to use outside light.  If outside I would look for a bright day, not raining.  I could use props like furniture or have the animals hand held by someone, if they are small.  The pets may be more subdued indoors to produce relaxed compositions, and active outdoors resulting in more exciting shots.

                                                               Photo by snapped_up


5)  DO SOMETHING DIFFERENT
I should not be afraid to experiment.  I could place the animals in unusual settings to be more creative.  I might do this with manipulation.  I could change a background to show a plain one, like the one shown here, in order to set off the animal alone in the portrait, with no distracting background details.

                                                                      Photo by frozi

I like this image as it is amusing to think a rabbit would jump this high. Also the way he/she is in the spotlight and shows very clear details of fur, eyes and nails.   If I was not able to capture animals in the wild adequately, I could perhaps resort to pets with a twist  (Steve's advice).